Category : Tips

Brand Your Business

Like I’ve discussed before, Photoshop can offer those who come to learn it awesome careers in design. There are endless utilities that Photoshop can offer to a business or brand, and you can be the magician who puts it to use for small or large companies. I previously talked about my friend who does vinyl wraps, and I wanted to share another post that is related, and it’s about branding. Branding is massive! Every big company knows this and it is why they spend millions on branding every year. The thing is however, you don’t need to be a big company to effectively brand, especially with the help of Photoshop. My friend who I mentioned in an earlier post is like a branding machine, and it’s not because he went to school for marketing, it’s because of his expertise with Photoshop. He recently branded this company www.phoenixwaterdamage.org and made them a custom vinyl for their truck. The company was previously paying a large marketing firm in Arizona and paying them $15,000 a month! I forget how my friend met the business owner, but upon realizing how much he was paying for branding quickly offered him comparable services for less than half the price. Within two months the business owner told him he was more satisfied with the work my friend was doing than he was with the work performed by the big agency. My friend said it was simply because he knew photoshop so well and could design exactly what the business owner had in mind.

It takes years to develop the type of skills my friend has, but keep in mind it takes years to get a degree in a related field, and their is no promising you will be an expert when you come out. Especially if you simply get a marketing degree. I’m not downing higher education, but simply stating that the value of specialized knowledge with a tool like Photoshop is unparalleled. It’s like saying, do you want a cinematographer who studied it in school or someone who knows the equipment in and out. Take time to master Photoshop and the job opportunities and career opportunities are endless.

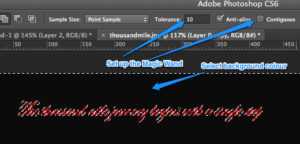
Here’s another quick tip to help you master Photoshop.

Merge Two Images In Photoshop

(more…)


Free Transform (command + t)

Hey guys,

I want to talk about a pretty cool aspect of Photoshop that will come in handy when you are trying to contort images. It’s called free transform and it allows you to grab on the outside of an image and stretch, move, and resize it to your hearts content. I most commonly use free transform to resize images making them smaller or larger but it has many applications. The path for getting to free transform is simple, it’s just edit > free transform. Once you have clicked free transform you will see your image has little squares at each corner, and on each side of the image. You can grab anyone of these squares and stretch the image to your desired length. I strongly suggest getting in the habit of holding shift before doing so because it will maintain the proportions of the image. However there may be many instances where maintaining the proportion of the image is not necessary or not desired. A cool example of this is when you see people fitting images into tablets or phone screens to make it appear the screen is displaying a certain image. This has become wildly popular online and I’m sure you have seen many examples of this. Here is an example!

photshop-monitor

The monitor is a stand alone image, but someone has placed this image on top pretending to be what is showing on the screen. In this scenario placing an image on top would be fairy easy since it is only one dimension. You could simply grab the corner of the image and stretch or shrink it accordingly to fit into the frame of the computer monitor. More difficult contortion would be if screen were at an angle with some dimension. For example the image below.

iphone-6-mockup

In this case on would have to stretch the image to make it appear to have some dimension. This would not be an instance where you would want to hold the shift key. In this scenario the best thing to do would be to hold (command+t) on a mac (ctrl+t) on a pc and grab the corner of your image, which in this case is a screenshot of a website, and drag it’s corner to the corner of phone screen. Do this separately with each corner and you will have an image the has dimension and appears to be congruent with the dimension of the phone. It may take some playing around but eventually you will be able to simulate the actual screen projection with what ever image or screen shot you desire.

Free transform is a super useful tool for beginners and experts alike. From simply resizing the image, to dramatically altering the contour of an image, free transform can do it all. Play around with the tool today and let me know what you think. Again sometimes it takes a little messing around to get it perfect, so don’t get discouraged if you are having a difficult time at first, expertise comes to those who are patient.


Beginer Tutorial

Good Afternoon, Morning, or Evening where ever you are time zone wise. I wanted to share a cool easy beginner tutorial I came across while browsing the web. This is a great tutorial for those of you who are new to photoshop and want to take advantage of some of its capabilities but don’t necessarily want to go through tons of schooling or workshops in order to do so. Photoshop has a lot of powerful tools right out of the box that can be a huge asset to professionals in many industries including print advertising, web development, photography and so on. This tutorial is geared towards the latter and shows users how to take advantage of some useful photoshop tools to really enhance your photos. Being a professional photographer does not demand elaborate equipment and software like it once did. Developments in the Photoshop software and the dramatic price reduction in its cost has made it widely available to start up businesses and entrepreneurs. Fortunately the internet has also offered users of photoshop a huge resource in the form of online tutorials. Instead of shuffling through user manuals and books to learn specific photoshop tools, people can now go to youtube or other places online to learn specific tools, including on our site. The ability to watch as someone performs the task through video is a tremendous advantage, and has made photoshop more appealing to a larger market. People who have been previously intimated by the software can now learn the program at their own speed through endless tutorials. I know these types of tutorials have been a huge help to me through my process of learning and coming to understand Photoshop and I know they have helped countless others. Below is a great beginner tutorial that goes over a lot of the basic functions of photoshop, and some tools that have application on almost any project that one would be working on with Photoshop. If you have questions don’t be afraid to ask, and if you find it useful please share with others.

(more…)


Get a Job Using Photoshop: Leverage a Portfolio!

Photoshop is now the tool of choice for many large industries, and it has become a professional pursuit for many to understand the full capacity of what Photoshop has to offer. My hats off to those who use Photoshop in a professional setting sharing digital art with the world, and getting paid to do so. I have a friend and long term Photoshop buddy who is putting his skills to work at a vinyl wrap shop in Phoenix. He is one of the best graphic artists I know, and it’s awesome to see him really able to explore his creativity and his abilities by creating designs for unique luxury automobiles. You can check out some of his work at phoenixautowrap.com and see his versatility. Look how fun this must be to spend your days designing wraps like these ones.

vinyl wraps

Thank you Photoshop for giving creative people, a great way to make a living!

(more…)


Tips: Clone Stamp

So I want to talk briefly about the clone stamp tool for those beginners who are not overly familiar with the tool. The clone stamp tool for Photoshop is an extremely effective tool for designers who are looking to replicate an area of a picture with specific pixels found elsewhere on the image. By selecting the clone stamp tool which looks like this.

clone-stamp-tool-photoshop

And then taking your cursor over a selected part of the image you want to clone and clicking option+click (mac) then you select those pixels. Once those pixels are selected, you can stamp them throughout the image. This is a great way to hide blemishes, wrinkles or anything else on personal photos, or a great way to add cool effects to images. By replicating specific parts of the image you can create some really cool abstract images like the one below.

clone stamp

Clone stamp has personally helped me in enhancing personal photos, but it also just a really fun tool to play around with. Try it out for yourself!


Tips: Make a Transparent background in Photoshop

make transparent in photoshop

The first thing that people ought to become familiar with when it comes to photoshop is simple transparency. It was one of the first things I learned and the first that really gets people excited about the capabilities of photoshop. All though transparency is very elementary for most photo editors and something that is possible on many web editing softwares, it’s still something I want to cover.

Transparency all begins with the magic wand tool.

magic-wand-photoshop

The magic is literally just that – a magic wand that will make anything disappear, just without having to say the whole abracadabra thing. By selecting the magic wand tool you can simply click on something and it will select an outline. See Below.


photoshop magic wand tolerance

You can see from the image that when you take the magic wand and select the black background it will select the border of everything in red because it senses that contrast. If you adjust the tolerance at the top of the screen you can adjust the range of the selection and how much it must adhere to the area you clicked. Sometimes you have to increase the tolerance in order to capture the entire image you want to select. In the image above you don’t have to worry about the tolerance because the contrast of the black and red is so easy for photoshop to discern.

Once you have selected the part of the picture you want to remove in order to make the picture transparent (no background), then simply click “delete.” This will remove that selection and leave you with the outline of whatever was not deleted. In the example above, clicking delete would leave you with just the red writing and transparent background.

Make sure to always save your transparent images as .png in order maintain the transparent background.


Hopefully you guys found this useful, and will stay tuned for future posts.